All posts by Tyler Nelson

Explanation Slicing

PhotoStudy workflow, Explanation Slicing, is broken up into 4 segments:

  1. Concept or Theory
    What is the knowledge or technique the students need to solve the problem?
  2. Step-by-Step Explanation
    How to work through the problem. Explain each step in words as you show them
  3. Final Solution
    What is the final solution(s)? Explain
    why it is the answer by relating it back to the original problem
  4. Follow Up Discussion
    Further Expert <-> Student interaction to resolve any questions the student may have

Once you have won a bid and are routed to the problem, you will see a screen as below:
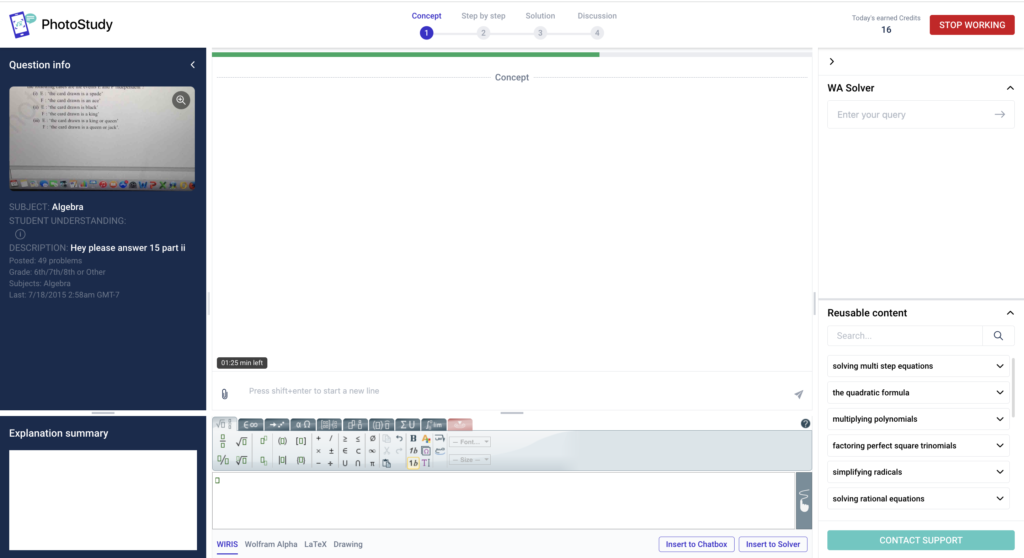
Concept

The first section is the problem Concept.  Here, you will outline a general concept or fundamental theory that will apply to the problem so the student knows

You can view your work and check for errors before submitting it.  After the Concept is submitted, you’ll move on to the step-by-step explanation module.

Problem Explanation

The second section is the problem Explanation.  Here you will be working through all the step-by-step details needed to solve the problem.

In the view below, you can access equation editors and the Wolfram Alpha tool to help compose beautiful content.

Clicking ‘Insert’ in the upper box will move any content in that box down below, where it can be sent off to the student.
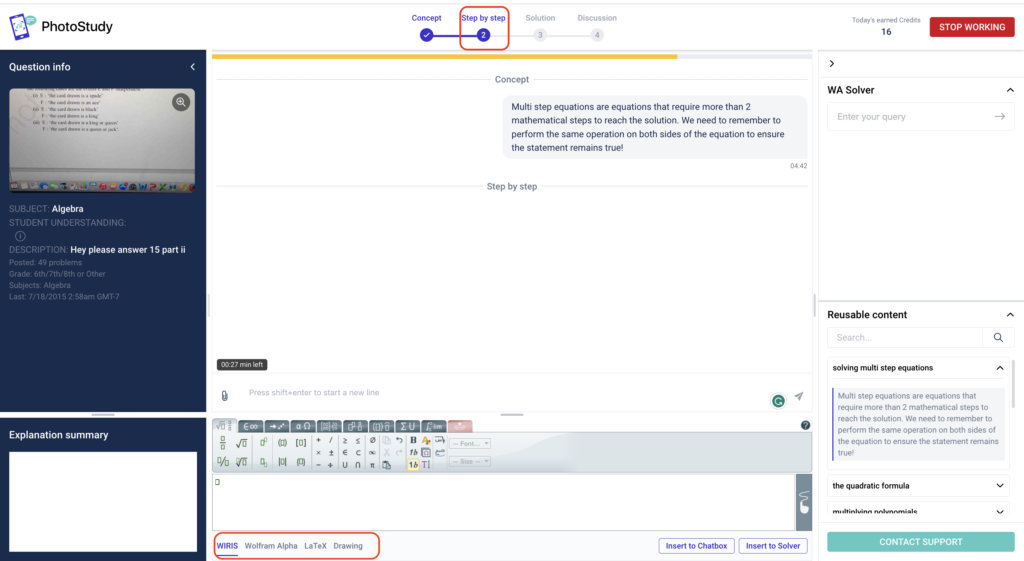
This line is called the “Slicer” and can be dragged up and down in-between lines of content to create “slices”. 

Hitting the ‘send’ button on the slicer line will send any content above the line to the student.  

This allows Experts to deliver their step-by-step explanations in easily understandable, bite-size chunks to the student. We strongly recommend that Experts create a slice for every two or three lines of content to send along to the student.

Also, after every two slices, we’ll send an automatic message to the student asking if they understand so far.  You can pause and edit these messages before they are delivered by clicking in the chat module.

Don’t worry, even after sending a slice, you can always edit a previously sent slice, which will automatically update on the student side.

REMEMBER  students need to be kept aware of progress, so after a few minutes of inactivity on the left side chat box, a reminder message will appear to engage with the student. It is good practice to send slices regularly!
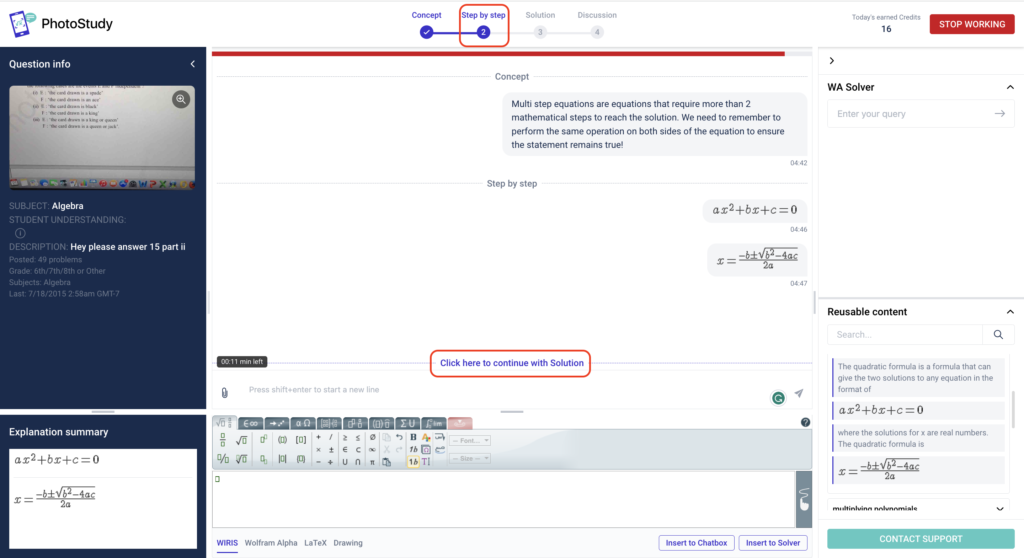
After supplying all steps necessary to get the final answer, you can review the entire step-by-step explanation in the Explanation summary box on the left-hand side. When you are confident with your explanation, click the blue line “Click here to continue with Solution” to go to the Final Solution section.

Final Solution

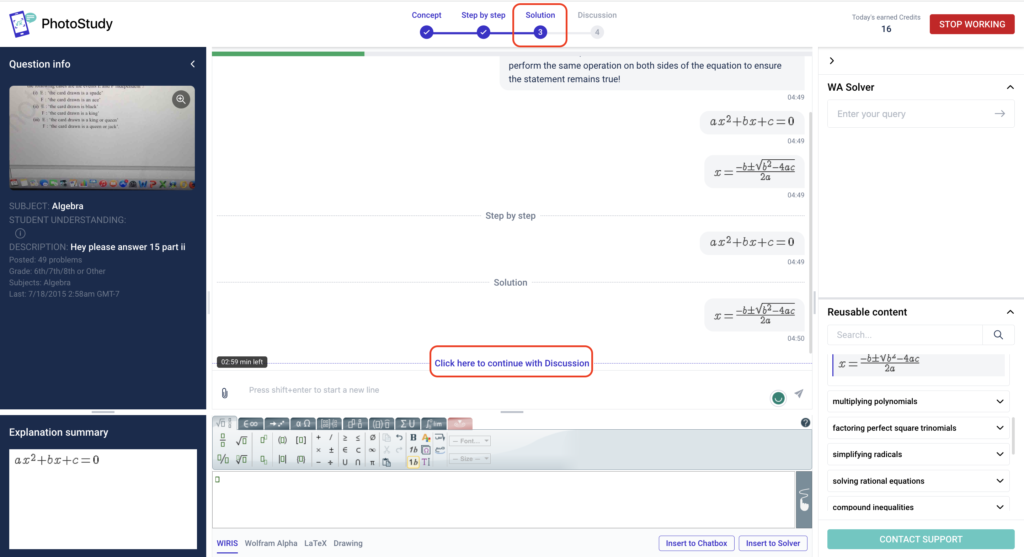
The third section is the Final Solution. Just like it sounds, this is where you will compose the final solution and send it along to the student.  Be sure to relate your solution back to the original problem posted, and be sure you are answering the original problem in the correct units.  For example, if the question asks for meters2, be sure your solution reflects square meters.
Discussion

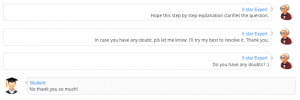
Following the Final Solution is Discussion.  Remember you’ll still be connected in chat with the student and this is another opportunity to answer any of their questions about your explanation and clarify any doubts.

The discussion step is part of the full explanation process and it is expected that Experts check with the student to see if they have any questions about your explanation.  The composition window as well as the equation editors are available for use during the discussion.

After reviewing the explanation, the student may choose to end the chat on his or her own or if they are inactive in the chat, we will automatically end the session prematurely to save you time.

Otherwise – as the expert – you are expected to chat with the student for the full 10 minute session & ensure that the student fully understands your explanation.

Please do not ever ask the student to end the session, doing so is extremely poor customer service and can result in suspension or termination

Final Notes

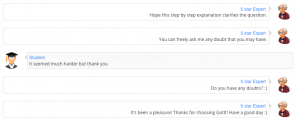
To receive the best student ratings & audit scores, it’s very important to clarify any doubts the student might have once he/she has reviewed your explanation.

Again – the best learning occurs when both students & experts are engaged in chat with each other.

Once the session ends, you’ll see a pop-up to rate the student.  This is your chance to help monitor the Got It! community & let us know if anything inappropriate happens.
What Makes a 5 Star-Rated Session?

What makes a 5 star-rated session?

(Getting low ratings? Looking for ways to improve your sessions?)

Study experts with higher ratings are routed more questions for bidding AND are more likely to win the bid. Here are some tips from our 5-star Study Experts that can help raise your rating.

Remember, our mission is ensuring the highest educational sessions for our students – not only providing the correct answer, but also helping them understand the concepts and how to apply them to get the correct answer.

  • Ensuring the student understands the explanation and final answer
  • Slicing your explanation multiple times so the student can follow along
  • Engaging and updating the student as you are working
  • Use of proper English and grammar
  • Using LaTex or Wiris editor
  • Setting time expectations
  • Clarifying the question
  • Closing out of a session properly
  • Things to avoid

Ensuring the student understands the explanation and final answer

  • After providing the concept, step-by-step explanation, and final answer – ask if the student understands how you arrived at the final answer. Also, help clarify if (s)he does not understand – remember, just because you have provided the final answer does not mean the session over. The student may have additional questions.

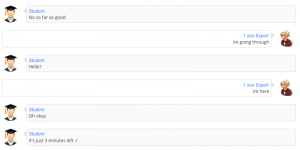
  • Do not continue explaining a problem if the student is clearly not following.

Slicing your explanation multiple times so the student can follow along

  • Slice your explanations in multiple parts – this way shows the students you are continuously working on the problem and gives the students a chance to speak up if they are unclear about a particular step. Students have a much better experience with Experts who use slicing since they feel they are not waiting as long for a solution.

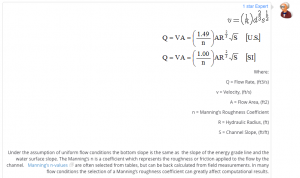
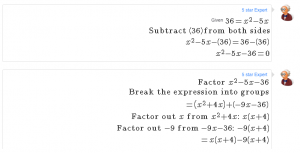
  • Do not lump the entire explanation into one message – this method has a greater chance of a confusing a student during the explanation, causing you to explain the step again and spending more time on a problem. Additionally, note the blue text in the below explanation – hyperlinks to external sites are strictly forbidden and will result in disciplinary action.

Engaging and updating the student as you are working

  • Talk to the student throughout the session – this method lets the student know you are working through problems, putting him/her at ease. Remember, these students may be potentially stressed from being unable to complete the problem – this is your chance to help ease their frustrations and make learning a more enjoyable experience!

  • Do not ignore what the student says or disappear for the majority of the session to solve the problem. These sessions are a dialogue between Expert and student, so answer appropriately and follow up with questions they may have.

Use of proper English and grammar

  • A majority of our students are English speakers, so using good English improves the quality of your explanations.

  • Poor English and typos will make explanations harder to understand and potentially confuse the students more.

Using LaTex or Wiris editor

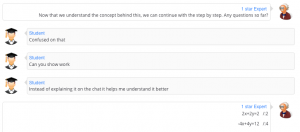
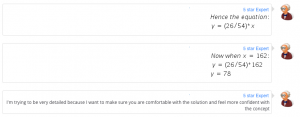
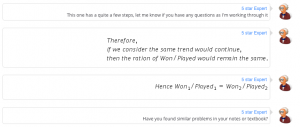
  • The LaTex and Wires editor makes equations easier to understand – it is crucial to use these tools as mathematical problems are difficult to type and read using plain text.

  • Not using the LaTex and Wires editor increases the chances a student will get lost during the explanation. Take a look at the difference between the example above and below – see how much easier it is to read mathematical equations after being processed by LaTex and Wires?

Setting time expectations

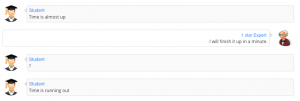
  • Let the student know that it will take a few minutes to solve the problem. We understand some problems may be more difficult and take longer to explain, which is why we also recommend splitting up the explanation (as already mentioned above) to walk the student to the correct answer.

  • Do not leave the student to solve the problem without telling him/her how long it will take. Students may have their own idea for how long it takes an Expert to solve a problem (we call them Experts for a reason) and be upset if you do not meet their expectations – increasing the chances that they would give a low rating.

Clarifying the question

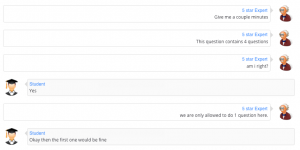
  • When an image contains more than one question, it is a great idea to clarify which question the student wants answered so an Expert does not answer the wrong one. This also sets the expectations with the students that only one question can be answer per session.

  • Do not answer whichever question you think the student wants. Always clarify the question as not doing so may lead to answering the wrong question and being unhelpful to the student.

Closing out of a session properly

  • Ask the student if (s)he needs any more help with the problem. If not, thank the student for using Got It! and end the session politely.

  • TIP – if you are still working on the problem there is a new shortcut, /time2, that notifies the student that you will continue working on the problem even after the 10-minute timer has expired.
  • Do not just provide the answer and ask the student to close the session. Students evaluate the entire session from beginning to end – it is in your best interest to be kind and courteous until the student closes the session.

TWO THINGS TO ABSOLUTELY AVOID, NO MATTER WHAT

  • Students expect Experts to be able to answer their questions correctly and explain how to get to the correct answer. Do not claim a question unless you are ABSOLUTELY certain you can solve it. Providing incorrect answers always leads to a low-rated session and the potential suspension/termination of a contract.

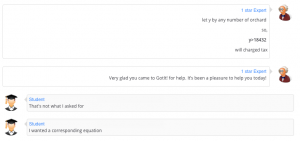
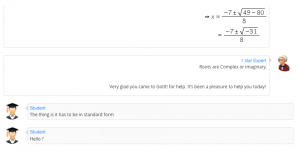
  • While we are all human and make mistakes sometimes, if a student is telling you that you don’t understand the question, do not continue to try answering the problem until you clarify what problem the student needs. A student is sending in a problem expecting an answer to that problem – providing an irrelevant answer leads to a low-rated session.

What Makes a Good Expert?

What makes a good Expert?

(Getting low ratings? Looking for ways to improve your sessions?)

Study experts with higher ratings are routed more questions for bidding AND are more likely to win the bid. Here are some tips from our 5-star Study Experts that can help raise your rating.

Remember, our mission is ensuring the highest educational sessions for our students – not only providing the correct answer, but also helping them understand the concepts and how to apply them to get the correct answer.

  • Ensuring the student understands the explanation and final answer
  • Slicing your explanation multiple times so the student can follow along
  • Engaging and updating the student as you are working
  • Use of proper English and grammar
  • Using LaTex or Wiris editor
  • Setting time expectations
  • Clarifying the question
  • Closing out of a session properly
  • Things to avoid

Ensuring the student understands the explanation and final answer

  • After providing the concept, step-by-step explanation, and final answer – ask if the student understands how you arrived at the final answer. Also, help clarify if (s)he does not understand – remember, just because you have provided the final answer does not mean the session over. The student may have additional questions.

  • Do not continue explaining a problem if the student is clearly not following.

Slicing your explanation multiple times so the student can follow along

  • Slice your explanations in multiple parts – this way shows the students you are continuously working on the problem and gives the students a chance to speak up if they are unclear about a particular step. Students have a much better experience with Experts who use slicing since they feel they are not waiting as long for a solution.


  • Do not lump the entire explanation into one message – this method has a greater chance of a confusing a student during the explanation, causing you to explain the step again and spending more time on a problem. Additionally, note the blue text in the below explanation – hyperlinks to external sites are strictly forbidden and will result in disciplinary action.

Engaging and updating the student as you are working

  • Talk to the student throughout the session – this method lets the student know you are working through problems, putting him/her at ease. Remember, these students may be potentially stressed from being unable to complete the problem – this is your chance to help ease their frustrations and make learning a more enjoyable experience!
  • Do not ignore what the student says or disappear for the majority of the session to solve the problem. These sessions are a dialogue between Expert and student, so answer appropriately and follow up with questions they may have.

Use of proper English and grammar

  • A majority of our students are English speakers, so using good English improves the quality of your explanations.

  • Poor English and typos will make explanations harder to understand and potentially confuse the students more.

Using LaTex or Wiris editor

  • The LaTex and Wires editor makes equations easier to understand – it is crucial to use these tools as mathematical problems are difficult to type and read using plain text.

  • Not using the LaTex and Wires editor increases the chances a student will get lost during the explanation. Take a look at the difference between the example above and below – see how much easier it is to read mathematical equations after being processed by LaTex and Wires?

Setting time expectations

  • Let the student know that it will take a few minutes to solve the problem. We understand some problems may be more difficult and take longer to explain, which is why we also recommend splitting up the explanation (as already mentioned above) to walk the student to the correct answer.

  • Do not leave the student to solve the problem without telling him/her how long it will take. Students may have their own idea for how long it takes an Expert to solve a problem (we call them Experts for a reason) and be upset if you do not meet their expectations – increasing the chances that they would give a low rating.

Clarifying the question

  • When an image contains more than one question, it is a great idea to clarify which question the student wants answered so an Expert does not answer the wrong one. This also sets the expectations with the students that only one question can be answer per session.

  • Do not answer whichever question you think the student wants. Always clarify the question as not doing so may lead to answering the wrong question and being unhelpful to the student.

Closing out of a session properly

  • Ask the student if (s)he needs any more help with the problem. If not, thank the student for using Got It! and end the session politely.

  • TIP – if you are still working on the problem there is a new shortcut, /time2, that notifies the student that you will continue working on the problem even after the 10-minute timer has expired.
  • Do not just provide the answer and ask the student to close the session. Students evaluate the entire session from beginning to end – it is in your best interest to be kind and courteous until the student closes the session.

TWO THINGS TO ABSOLUTELY AVOID, NO MATTER WHAT

  • Students expect Experts to be able to answer their questions correctly and explain how to get to the correct answer. Do not claim a question unless you are ABSOLUTELY certain you can solve it. Providing incorrect answers always leads to a low-rated session and the potential suspension/termination of a contract.

  • While we are all human and make mistakes sometimes, if a student is telling you that you don’t understand the question, do not continue to try answering the problem until you clarify what problem the student needs. A student is sending in a problem expecting an answer to that problem – providing an irrelevant answer leads to a low-rated session.